• Skip to main content
  • Skip to primary sidebar
  • Skip to footer

This Home Made Life logo

  • Home
  • About
  • Blog
  • Business
  • Cooking
  • DIY
  • Family
  • Home & Garden
  • Money
  • Travel
  • Contact

DIY

Mastering the Art of DIY Curtains: A Comprehensive Guide for Beginners

May 18, 2023

Embarking on a DIY curtain project can be an exciting and rewarding endeavor, allowing you to personalize your living space while saving money. Whether you’re a beginner or have some sewing experience, this comprehensive guide will walk you through the process of creating beautiful curtains that perfectly complement your home decor. From selecting the right fabric to mastering essential sewing techniques, you’ll gain the confidence and skills needed to tackle this project with ease.

1. Understanding Fabric Choices:

When it comes to sewing curtains, choosing the right fabric is crucial for both functionality and aesthetics. Consider the following factors when selecting your fabric:

a) Weight and opacity: Determine whether you want lightweight, sheer curtains or heavier, blackout options. The weight and opacity will influence the amount of light that filters through, as well as the overall appearance of your curtains.

b) Durability: Curtains are subjected to daily wear and tear, so opt for durable fabrics that can withstand frequent use and washing.

c) Style and design: Consider the existing decor and color scheme in your room. Choose fabrics that complement or enhance the overall aesthetic, whether you prefer bold patterns, solid colors, or textured materials.

2. Taking Accurate Measurements:

Before you begin sewing, it’s important to take precise measurements to ensure your curtains fit your windows perfectly. Here’s how to go about it:

a) Measure the width: Start by measuring the width of your window or the curtain rod, depending on how you plan to hang the curtains. Add extra width for fullness and an elegant drape.

b) Determine the length: Measure the length from the top of the curtain rod to the desired end point of your curtains. Consider whether you want floor-length, sill-length, or café-style curtains.

c) Hem allowance: Remember to account for the hem allowance when measuring the length. This will vary based on the style of hem you choose.

3. Essential Sewing Techniques:

To create polished and professional-looking curtains, familiarize yourself with these fundamental sewing techniques:

a) Hemming: Hemming is essential to give your curtains a finished edge. Depending on your preference, you can choose between single-fold, double-fold, or blind hems.

b) Straight seams: Mastering straight seams will ensure clean lines and prevent your curtains from looking uneven. Practice sewing straight lines on scrap fabric before starting on your curtains.

c) Pleating: If you desire pleated curtains, learn various pleating techniques such as pencil pleats, pinch pleats, or goblet pleats. Each style creates a unique look and requires specific folding and stitching methods.

4. Case Studies:

Let’s explore a couple of case studies to provide practical examples of DIY curtain projects:

a) Case Study 1: Café-Style Kitchen Curtains

In this scenario, we’ll guide you through creating charming café-style curtains for your kitchen windows. These curtains provide privacy while still allowing natural light to filter in.

i) Fabric selection: Choose a lightweight and washable fabric that complements your kitchen decor.

ii) Measurement and cutting: Measure the width and length of your windows and cut the fabric accordingly, adding allowances for hems and pleats.

iii) Hemming and pleating: Hem the bottom and sides of the curtains, and create a rod pocket or use clip-on rings for easy hanging.

iv) Final touches: Hang the curtains and adjust the pleats to achieve the desired look.

b) Case Study 2: Floor-Length Blackout Curtains

If you’re aiming to create dramatic, floor-length curtains for your bedroom or living room, this case study will guide you through the process.

i) Fabric selection: Opt for a heavyweight fabric with blackout properties to block out light and provide insulation.

ii) Measurement and cutting: Measure the width and length of your windows, ensuring that you account for additional fabric for hems and pleats. For floor-length curtains, it’s recommended to add a few inches to the length to allow for a puddling effect.

iii) Hemming and pleating: Hem the bottom and sides of the curtains, ensuring that the hems are straight and even. If you desire pleats, determine the type of pleats you want and create them accordingly. Pinch pleats or goblet pleats work well for floor-length curtains, providing an elegant and tailored appearance.

iv) Hanging and final adjustments: Install the curtain rod or track according to the manufacturer’s instructions. Hang the curtains and make any necessary adjustments to the pleats to ensure they fall evenly and create a pleasing drape.

5. Additional Tips and Tricks:

To enhance your DIY curtain-making journey, here are some additional tips and tricks to keep in mind:

a) Pre-wash fabric: Before cutting and sewing your curtains, it’s advisable to pre-wash your fabric to prevent any shrinkage or color bleeding that may occur during subsequent washes.

b) Use proper tools: Invest in quality sewing tools such as sharp fabric scissors, measuring tape, pins, and a sewing machine with the appropriate needles and thread for your fabric.

c) Practice on scraps: If you’re new to sewing or trying out a new technique, practice on fabric scraps first to build confidence and perfect your skills.

d) Experiment with trims and embellishments: Add a personal touch to your curtains by incorporating trims, tassels, or decorative elements. These can elevate the overall look and match your unique style.

e) Consider lining options: Depending on the desired functionality and appearance of your curtains, you may choose to line them. Lining provides additional privacy, insulation, and helps protect the fabric from sun damage.

f) Seek inspiration: Explore magazines, online platforms, and social media for inspiration and ideas. Look for curtain styles, fabric combinations, and creative solutions that resonate with your vision.

6. Customizing Curtain Styles:

Curtains offer a versatile canvas for expressing your personal style. Consider these customizable options to make your curtains truly unique:

a) Tie-backs and holdbacks: Add elegance and functionality to your curtains by incorporating tie-backs or holdbacks. These accessories can be made from matching fabric, decorative cords, or even repurposed items like vintage doorknobs or tassels.

b) Valances and swags: Enhance the aesthetic appeal of your curtains with valances or swags. These decorative fabric treatments can be added above the curtains to create a layered look or frame the window. There are various styles to choose from, including box pleat valances, gathered swags, or tailored cornices.

c) Embroidery and appliqué: For a touch of craftsmanship, consider embellishing your curtains with embroidery or appliqué. These techniques allow you to add intricate patterns, monograms, or motifs to your curtains, transforming them into one-of-a-kind pieces of art.

7. Sustainable Curtain Making:

According to a study conducted by the Sustainable Furnishings Council (SFC), using eco-friendly fabrics in home decor, such as curtains made from organic cotton, linen, or bamboo, not only reduces environmental impact but also promotes healthier indoor air quality [1].

In today’s eco-conscious world, sustainable practices are gaining prominence. Apply these principles to your DIY curtain project:

a) Upcycling: Give new life to old curtains or repurpose fabric from other household items. By upcycling, you can reduce waste and create unique curtains with a vintage or eclectic vibe.

b) Eco-friendly fabrics: Choose fabrics made from natural, organic, or sustainable materials such as linen, hemp, or bamboo. These options are not only environmentally friendly but also offer durability and aesthetic appeal.

c) Energy-efficient choices: Consider incorporating energy-efficient features into your curtains. Thermal or blackout linings can help regulate temperature and reduce energy consumption by keeping heat in during colder months and blocking out sunlight during warmer months.

8. Troubleshooting Common Issues:

Even with careful planning, you may encounter some challenges during your DIY curtain project. Here are solutions to common issues:

a) Uneven hems: To ensure even hems, measure and mark them carefully before sewing. Use a ruler or a measuring gauge to maintain consistency. If your hems still turn out uneven, carefully unpick the stitches and make the necessary adjustments.

b) Wrinkles and creases: Iron your fabric before cutting and sewing to eliminate wrinkles. Additionally, hang your curtains for a few days before making any final adjustments. Gravity will naturally help smooth out any remaining creases.

c) Uneven pleats: If your pleats appear uneven or misaligned, carefully remove the stitching and adjust them as needed. Ensure that you distribute the fabric evenly along the pleat line for a uniform look.

9. Curtain Maintenance and Care:

To keep your DIY curtains looking their best for years to come, follow these maintenance tips:

a) Regular cleaning: Dust your curtains regularly to prevent the accumulation of dirt and allergens. Depending on the fabric, you can either vacuum them using a soft brush attachment or gently shake them outdoors.

b) Washing instructions: Refer to the care instructions specific to your fabric when it comes to washing your curtains. Some fabrics may require handwashing or delicate machine cycles, while others may be suitable for regular machine washing.

c) Ironing and steaming: Iron or steam your curtains to remove any wrinkles or creases. Follow the fabric’s care instructions and use the appropriate heat settings.

d) Sun protection: Protect your curtains from direct sunlight to prevent fading and damage. Consider using window coverings or sheers to filter out UV rays and extend the lifespan of your curtains.

10. Inspiring Curtain Design Ideas:

To spark your creativity, here are a few curtain design ideas to consider:

a) Color blocking: Use contrasting colors or patterns to create striking color-blocked curtains. This modern and bold approach can add a vibrant focal point to any room.

b) Ombre effect: Create a stunning gradient effect by using fabrics in varying shades of the same color. This technique adds depth and visual interest to your curtains.

c) Mixed patterns: Combine different patterns, such as stripes, florals, or geometric prints, to create a visually dynamic and eclectic look. Just ensure that the patterns share a common color scheme or theme for a cohesive appearance.

d) Layered sheers: For an ethereal and romantic touch, layer sheer curtains in different colors or textures. This creates a soft and dreamy ambiance while still allowing natural light to filter through.

e) Bold prints: Make a statement with curtains featuring bold and large-scale prints. Whether it’s tropical motifs, animal prints, or abstract designs, these curtains can become the focal point of any room.

f) Vintage-inspired lace: Opt for delicate and intricate lace fabrics to create a vintage and romantic atmosphere. Lace curtains add a touch of elegance and sophistication to any space.

According to interior design experts at the National Association of Home Builders (NAHB) [2], color blocking is a popular design trend that can be applied to curtains to create a bold and modern statement in any room. By contrasting colors and patterns, you can achieve a visually striking effect that adds personality and visual interest to your space.

11. Seeking Inspiration from DIY Communities:

Engaging with DIY communities can be a valuable source of inspiration and support. Here are a few platforms where you can find ideas, guidance, and connect with fellow DIY enthusiasts:

a) Online forums and groups: Join online forums, such as Reddit’s r/DIY or dedicated Facebook groups, where members share their projects, tips, and troubleshooting advice. It’s a great way to learn from experienced crafters and engage in discussions.

b) Social media platforms: Follow hashtags like #DIYcurtains or #SewingProjects on Instagram, Pinterest, and TikTok to discover a plethora of curtain design ideas, tutorials, and step-by-step guides. You can also connect with other DIYers and share your own creations.

c) Local sewing clubs or workshops: Check if there are any sewing clubs or workshops in your area. These communities often organize events and classes where you can learn new techniques, exchange ideas, and gain hands-on experience.

12. Celebrating Your DIY Success:

Completing a DIY curtain project is a significant accomplishment. Take a moment to appreciate your hard work and showcase your creativity. Here are a few ways to celebrate:

a) Share your project: Take photos of your finished curtains and share them on social media or DIY platforms. Be proud of your work and inspire others with your creativity.

b) Host a home reveal: Invite friends and family over for a home reveal event, showcasing your newly crafted curtains. Create a warm and inviting atmosphere where everyone can admire your DIY skills.

c) Document your journey: Keep a journal or create a scrapbook documenting your DIY curtain project. Include photos, fabric swatches, and notes on the process. This will serve as a beautiful memento and a source of inspiration for future projects.

d) Start a new project: Once you’ve completed your curtains, don’t be afraid to dive into your next DIY adventure. Building on your newfound skills, explore other sewing projects or home decor crafts that pique your interest.

13. Another Case Study on No-Sew Curtain Alternatives:

Not everyone may be comfortable with sewing or have access to a sewing machine. Here’s a case study that explores no-sew alternatives for creating curtains:

a) Fabric tape or fusible web: Fabric tape or fusible web allows you to create hems and join fabric panels together without sewing. Simply follow the manufacturer’s instructions to attach the fabric using heat.

b) Clip-on curtain rings: Instead of sewing rod pockets or tabs, opt for clip-on curtain rings. These rings can be easily attached to the fabric, allowing you to hang the curtains directly from a curtain rod or wire.

c) Fringe or tassel trims: Enhance the look of your curtains by adding fringe or tassel trims. These decorative elements can be attached using fabric glue or adhesive tapes, offering a no-sew way to add flair to your curtains.

14. Incorporating Functional Features:

Curtains can serve multiple purposes beyond aesthetics. Consider these functional features to enhance the performance of your DIY curtains:

a) Thermal insulation: If you live in a region with extreme temperatures, consider adding thermal lining to your curtains. This additional layer helps regulate the room temperature, keeping it cooler in the summer and warmer in the winter.

b) Noise reduction: If you’re looking to create a quieter environment, choose fabrics with noise-absorbing properties or consider adding an extra layer of soundproofing material between the fabric layers.

c) Privacy enhancements: For rooms that require additional privacy, such as bedrooms or bathrooms, consider using blackout fabrics or adding a privacy lining to ensure complete opacity.

15. Sustainable Window Treatment Alternatives:

In addition to DIY curtains, there are other sustainable window treatment options to explore. Here are a few eco-friendly alternatives:

a) Roller blinds: Roller blinds made from natural materials like bamboo or organic cotton are a sustainable and versatile option. They provide privacy and light control while adding a touch of natural beauty to your windows.

b) Roman shades: Roman shades are another sustainable alternative that offers style and functionality. Choose fabrics made from sustainable fibers or repurpose old curtains to create custom Roman shades.

c) Wooden shutters: Opting for wooden shutters made from sustainably sourced materials adds an elegant and eco-friendly touch to your windows. They are durable, long-lasting, and provide excellent light control.

16. Considering Safety Measures:

When designing and installing curtains, it’s crucial to prioritize safety, especially if you have young children or pets at home. Here are some safety measures to keep in mind:

a) Cordless options: Choose curtain styles that don’t require cords or opt for cordless blinds or shades to eliminate the risk of entanglement for children or pets.

b) Cord safety devices: If your curtains have cords, install cord safety devices such as cord cleats or cord tensioners to secure the cords out of reach of children.

c) Secure installations: Ensure that curtain rods, brackets, and other hardware are properly installed and securely anchored to prevent accidents or falls.

17. Engaging in DIY Curtain Communities:

Connecting with fellow DIY enthusiasts can provide a wealth of knowledge, support, and inspiration. Consider engaging with DIY curtain communities through the following avenues:

a) Online tutorials and classes: Explore websites, video platforms, or online learning platforms that offer detailed DIY curtain tutorials and classes. Engage with the instructors and fellow participants to share your progress and seek guidance.

b) Local workshops and events: Check if there are any local workshops or events focused on sewing or DIY home decor. Participating in these activities allows you to learn from experts, exchange ideas, and connect with like-minded individuals in your community.

c) DIY blogs: Explore DIY blogs that specialize in home decor and sewing projects. Many bloggers share step-by-step tutorials, tips, and tricks for creating beautiful curtains. Engage with the blog community by leaving comments, asking questions, and sharing your own experiences.

d) Social media communities: Join social media groups or communities dedicated to DIY home decor, sewing, or curtains. These platforms provide a space to connect with fellow enthusiasts, share your projects, and gain inspiration from others.

18. Case Study 4: Customizing Ready-Made Curtains:

If you’re not confident in your sewing skills or don’t have the time to create curtains from scratch, you can still achieve a personalized look by customizing ready-made curtains. Here’s a case study on how to do it:

a) Adding trims and embellishments: Purchase ready-made curtains in a plain or simple design and enhance their appearance by adding trims, such as pompoms, lace, or ribbon. Simply use fabric glue or stitch the trims onto the curtains for a custom touch.

b) Dyeing or painting: If you can’t find curtains in the desired color or pattern, consider dyeing or painting them to achieve the look you want. Follow the dye or fabric paint manufacturer’s instructions and test a small area first to ensure the desired outcome.

c) Panel combinations: Mix and match different ready-made curtain panels to create a unique look. Play with patterns, colors, and textures to achieve a custom design that reflects your style.

d) Length adjustments: If the length of the ready-made curtains doesn’t match your window’s measurements, you can easily hem them to the desired length. Use fabric glue or sew a new hemline to achieve the perfect fit.

19. Curtain Care and Storage:

Proper care and storage are essential to maintain the longevity and appearance of your curtains. Consider the following tips:

a) Regular cleaning: Dust your curtains regularly using a soft brush attachment on your vacuum cleaner or shake them outdoors to remove dust and debris.

b) Spot cleaning: Attend to stains and spills promptly by spot cleaning the affected area using a mild detergent or stain remover. Always follow the manufacturer’s instructions and test the cleaning solution on a small, inconspicuous area first.

c) Professional cleaning: For delicate or heavily soiled curtains, professional cleaning may be necessary. Consult the care instructions or seek advice from a professional cleaner specializing in curtains and draperies.

d) Proper storage: When not in use, store your curtains in a cool, dry place to prevent damage. Avoid folding or crushing them excessively to maintain their shape. Consider using fabric bags or garment covers to protect them from dust and sunlight.

20. Final Thoughts:

Congratulations on embarking on your DIY curtain-making journey! By exploring the fundamentals of sewing, selecting the right fabrics, and incorporating your personal style, you have the power to transform your windows and enhance your living space. Whether you’re a beginner or an experienced crafter, remember that practice, patience, and creativity are key.

Don’t be afraid to experiment with different techniques, styles, and materials. Allow yourself to make mistakes and learn from them. The joy of DIY lies in the process and the satisfaction of seeing your creations come to life.

With the knowledge gained from this comprehensive guide, along with the inspiration from case studies and the support of DIY communities, you have the tools to create stunning curtains that reflect your unique style and personality. So, roll up your sleeves, thread your needle, and let your creativity flow as you embark on the exciting world of DIY curtains.

Filed Under: DIY

The True Cost Of DIY Wedding Invitations Might Surprise You

November 28, 2022


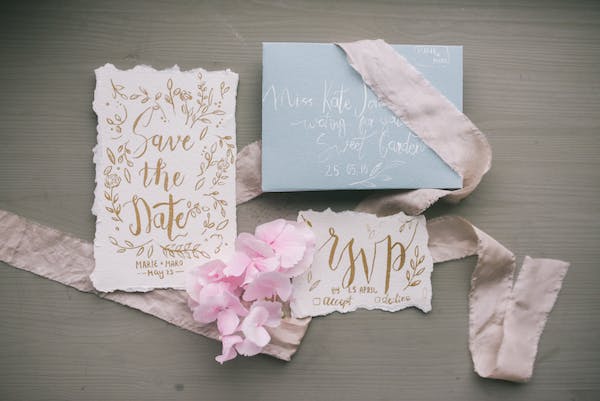
The cost of getting wedding invitations can vary in different ranges from almost a few pennies to thousands of Dollars. The upper cap does not have a particular limit, so as to say it can carry on to as much as you can expect. We mean if you have money, you can even send a person to deliver your invitation to each house with lots of goodies. You can spend as much as you want, and you also have the option of saving as much as you want. You can even spend no money, and you’ll still be able to send an invitation to every friend and family. If you want to save it all, you can just send an invitation over email, and you have to spend no penny on any formal card printing and stuff. But in general, people who like to spend some money to make their invitations memorable would have things in mind that fit the budget they set for spending on wedding invitations.

Sometimes people also find making DIY wedding invitations to give the invitations a personal touch. With the trend going up, more people are working on making DIY wedding invitations. Most people find these wedding invitations to be a better option than professionally printed ones. Some say that making a DIY card will give you a creative edge, like making a magnet save the date card which you can cherish for a long time. There are two reasons behind this. One is they consider making DIY invitations to create something rare and unique with a personal touch included. The other reason is they consider invitations to be cheaper than printed ones. While the first option can be true but the second one is something that people need to rethink. Often people do not add up all the things that you include in creating DIY wedding invitations, which sometimes can cross the budget you have in your mind, and you are going to find the printed ones are much cheaper than the ones you make.

Here are certain things that will prove to you that DIY wedding invitations are not as cheap as you think.

  • When you are making DIY cards, you require art supplies. You need to go shopping for art supplies and find All the materials that you need for making your wedding invitation card. The supplies that you buy would not be limited; you would need these supplies in abundance. For this, you need to make a list of guests so that you can have an account in mind of how many cards you are going to need. Once you have that figured out, you have to buy the supplies such that they are enough to finish as many cards as you have counted.
  • Buying the art supplies in abundance would then sometimes become more expensive than the cost of getting a card printed. Making one or a few cards can be reasonable, but when you are making so many invitations, then the art supplies required will be more, and the overall cost might be somewhere near or more than the cost of a professionally printed invitation.
  • The time that you invest in buying art supplies and finding designs or ideas that would make your card unique and creative is already a lot. On top of it, you are going to put a lot more time into making these DIY invitation cards. Making these cards will take a huge amount of time from your schedule. The time that you take to make the card and complete the task can be utilized in many other tasks. When you have a wedding to plan, there are many things that need your attention. You need to have a schedule so that every work is properly attended to so that there are no last-minute problems or issues on the big day. But when you are spending so much time making invitation cards at home, then it is affecting the time you can utilize on other important tasks. This Way, you are saving not only your time but also energy. If you analyze, you will see that professionally printed invitation cards are much more cost-effective than handmade ones.
  • Also, when you are making so many invitation cards, the amount of time and money you spend on making just a few cards will be almost equal to all your cards getting printed At Once by professionals. So when you compare both, you will find that getting professionally printed invitation cards are a lot more reasonable than handmade invitation cards.

Author Bio:

Lauren Watts is a blogger and working for Used House Of Vintage. She has a passion for writing and writes in different niches.


Filed Under: DIY

How To Know When To Change Your Furnace Filter

April 25, 2022

There’s a lot of debate about how often you should change your furnace filter. Some people say once a month, while others say every three to six months. The truth is, it depends on a lot of factors, like the type of filter you have, the size of your home, and how often your furnace is used. But generally speaking, you should change your filter every one to three months. A clogged filter can cause all sorts of problems for your furnace, including decreased efficiency and increased energy bills. It can also lead to furnace failure, so it’s definitely not something you want to ignore. If you’re not sure when the last time you changed your filter was, or you’re not sure which type of filter you have, give your furnace company a call. They should be able to help you out. They can give you specific information on how often to change furnace filter based on the type of furnace that you currently have in your home. Below, you’ll learn more about how to know when to change your furnace filter simply by following a few general rules.

Listen for an increase in noise from your furnace unit.

img

Most furnace filters should be replaced every few months, but the frequency may vary depending on the type of filter, the size of your home, and the number of pets you have. To know when to change the filter, listen for an increase in noise from your furnace unit. If the noise gets louder, it could be a sign that the filter is clogged and needs to be replaced.

Your furnace filter is clogged and not allowing air to flow through properly.

img

A furnace filter is clogged when it can’t let enough air through to keep the furnace running properly. This can cause the furnace to overheat, which can lead to a fire. It can also cause the furnace to shut down, which can lead to a loss of heating in your home. A clogged furnace filter can also prevent the furnace from heating your home properly, which can lead to higher energy bills. It can cause the furnace to break down, which can lead to expensive repairs. Or worse, it can cause the furnace to produce dangerous levels of carbon monoxide.

The furnace filter is old and needs to be replaced.

Did you know that the furnace system in your home is one of the most important pieces of equipment you have? Replacing your furnace’s air filter is a quick and easy way to improve the performance of your system and keep your family healthy. One way to tell if your furnace filter is old is to check the date on the filter. Most furnace filters have a date stamp on them, so you can tell how long the filter has been in use. If the date stamp is more than six months old, it might be time to replace the filter. Another way to tell if your furnace filter is old is to check the level of dust in your home. If you notice an increase in the amount of dust in your home, it might be time to change your filter. Finally, you can also tell if your furnace filter is old by checking the airflow coming from your furnace. If the airflow is weak, it might be time to change your filter.

If you’re experiencing any of these signs, it’s time to change your furnace filter. Even if you aren’t experiencing these signs but you’re noticing a difference in your home’s air quality, you should consider your air filter needs. Contact an HVAC technician to help you navigate care when it comes to maintaining your furnace.

Filed Under: DIY

Two DIY MREs that Are Easy & Simple to Make

April 5, 2022

Many people associate ‘Meals Ready to Eat’ commonly referred to as MRE, with meals for military personnel in combat or space Astronauts. However, MRE is the next best thing to having a cooked meal when you go out camping, mountain climbing, or want to spend a few days outdoors. Another growing need for MRE is preparedness for emergencies, such as natural disasters, blackouts, or conflicts. According to the owner of www.bugoutbill.com, the beauty of MREs is that you can eat them straight out of the packet without needing heat. If heat is necessary, one can use warm water or a camper’s stove.

There is nothing wrong with buying store-bought MRE for emergencies or outdoor occasions. It has become common for many people to make their MRE for exceptional events. Would you want to make your MRE? Well, consider the nutritional value of your own MREs and cooking for your taste buds. So, how can you make your own?

Consider foods high in calorie content, can last for a long time, do not need refrigeration, are lightweight, and require little or no cooking. Initially, you might need the following tools and ingredients to make your own MREs. You will need –

  • A food dehydrator or oven to dry out the selected food and fruits
  • A vacuum sealer in place of a dehydrator
  • Vacuum Sealing bags or Mylar Bags with Oxygen Absorbers.
  • A sealing heating rod.

With these tools and foods high in calories, let us review some of the simple MRE you can make. Try to pack each meal serving per bag per person.

For Breakfast

Oatmeal and Fruit Breakfast

Ingredients

  • 1–2 cups of oats toasted in honey and brown sugar
  • Dried fruits of your choice (Cranberries, raisins, cashew nuts, mango, blueberries, almonds, currants, dried dates, pistachio, etc.)
  • 1 Packet of powdered milk
  • 1 Packet of coffee or drinking chocolate mix (usually have coffee or cocoa with powdered cream and added sugar) or a teabag
  • 2 Packets of sugar
  • Warm water
  • 1 Energy bar (optional)

Method

In one sealing bag, pour in the toasted oats and seal the bag. In a different sealing bag, put in a packet of powdered milk, coffee/drinking chocolate/tea bag, and packet/s of sugar. Seal the dried fruits of choice in one bag. Combine all these in one larger sealing back to serve as one serving.

When you need to eat the MRE, add a cup of warm water into the bag of toasted oats and wait for the Oats to hydrate to the texture you want. Add in your dried fruits and sugar if so desired. Pour the powdered milk into a cup and add to the coffee/drinking chocolate/ teabag. You can finish your meal with an energy bar.

For Lunch or Dinner

Beef Chili Stew and Instant Potatoes

Preparation

  • Cook your favorite beef stew mixed with cooked beans and chili powder until done. Allow the beef chili stew to cool down, spread it out in your dehydrator’s tray/s (depends on how much stew you have made), and dehydrate it for approximately 10 hours. Halfway through the dehydration process, stir the chili to remove any lumps by breaking down chunks of meat and beans. Once the beef chili has dehydrated, distribute it into different sealing bags and seal.
  • 1 Packet of instant potato powder and distribute it into different sealing bags and vacuum seal.
  • Packets of salt and pepper packets to assemble in a different bag

Method

When you need the MRE, pour warm water into the instant potato powder bags, and add salt and pepper to taste. Stir until you smoothen it into mashed potatoes.

Meanwhile, mix a cup of the dehydrated beef chili stew with one cup of water in a pot and let rest for about 5 to 6 minutes. Heat the mixture until it boils for one minute. Reduce and simmer on low heat for another 8 to 10 minutes. Your food is ready to eat.

Conclusion

You can turn your home recipes into simple MRE. Dehydrated foods last longer than vacuum-sealed MRE. As stated above, the food ingredients you use should have a long shelf life and have high calories.


Filed Under: DIY

Everything You Need to Know About Decal & Its Use

December 12, 2021

Police Decal.jpg

Several people make use of decals for advertising business, personalizing, and decorating their properties, among other things. However, most of these people have no idea what they are.

If the question “what’s a decal?” is thrown at someone, they may look confused because this is not familiar to most. Hence, in this article, we will discuss what a decal is and everything you need to know about it.

Let us begin by defining this term…

What is a Decal?

It is an adhesive vinyl sticker that can be applied to almost all smooth areas and surfaces. This product can only be used one-time. It is popularly utilized for permanent promotion and advertisement projects because of its adhesive strength and resistance to environmental conditions.

Although a decal is made to be used permanently, it is also removable so it can be replaced with another when removed. A custom decal comes in different shapes, color, and size depending on what is printed on it. So, it could be a motivational quote, a company logo, custom graphics, or whatever you want it to be.

Benefits of Applying a Decal

The following are some benefits of applying it:

1. Durability

It can serve outdoor for more than four years without having any indication of wear because of its strong and permanent solution.

2. Resistance

It can survive the toughest weather or harshest environment. It has a strong resistance to environmental factors and chemicals that might affect its appearance, especially if it is used outdoor.

3. Attractive Appearance

It has an attractive appearance because of its variety of colors, sizes, and shapes. This makes it an excellent product that can be used for personalizing and marketing brands.

Where Can You Apply Decals?

They are applied on different surfaces or areas based on their characteristics and adhesiveness. They are mostly applied on:

1. Windows

The application of decals to glass windows takes advertisement to another extent. This is because windows work for both indoors and outdoors advertisements. Window decals provide a unique and different look to your designs because they are made from more than one material.

The following are some of the amazing types of decal window materials, their application spheres, and usages:

Matte

Matte or frosted decals serve as the best window decal for privacy. They deliver your message clearly while providing you with privacy. This is because they cannot be seen through. They are often used for the outdoor windows of stores, in offices’ boardrooms, working rooms, and so on.

Clear

This decal window material is transparent and is used when there is no need to block views. You can check here to discover what makes glass transparent. They also have mirror application; that is, their back (adhesive) comes with the decal print and can be fixed on your window surface from inside.

So, your decal gets to be indoors while being visible outside. This helps to keep the decal harmless and fresh longer than other decals.

Opaque

The opaque decal window material is non-transparent and is commonly used for business hour signs.

Perforated

This material is see-through and is often used on stores’ big windows. They have holes that increase the adhesiveness on it. Also, its visibility is one-sided; that is the side with the brighter light.

Bird decal.jpg

2. Cars

Decals are applied on cars for personal and business purposes. They have various sizes and are mostly made for various car parts.

They can be applied to the following car parts:

Roof

Decals can be applied to cover the roof of cars to personalize them. This application is a good option for car owners who do not want to redesign or change their car but wish to personalize it.

Hood

The application of decal to the hood of cars is great for advertisement. This is because the hood has a big space and is quite visible.

Tailgate

Car owners can express themselves and show their creativity by applying decals on their car’s tailgate.

Door

Decals applied to the car’s door or side can quickly catch the attention of people, especially if it has a captivating graphic. It could be a personal idea or your company info.

Window

Decals applied to car windows are great for advertising and personalization. This is because the window decals can be opaque, frosted, perforated, and clear. There is back window, and windshield decals based on their customization.

When decals are applied to a car’s front windshield, they are usually small to avoid blocking the front view. Front windshield decals have two common methods of application: top horizontally and vertically. The position of the decal in both methods is by the windshield’s corner.

Custom Cars or Vehicle Wrapping

People make use of decals to wrap all the parts of their vehicles to take advertising to the next level. Visit https://buildfire.com/how-to-promote-your-business/ to discover more ways to promote a business. A vehicle can be covered with graphics of something a company wants to advertise; this way the business vehicle will capture more attention.

Conclusion

In this article, we have discussed what a decal is, the benefits, and where it can be applied. We believe that it has been helpful and insightful.


Filed Under: DIY

Why Roofing Is NEVER a DIY Project | Roofing 101

November 5, 2021

Doing a DIY roofing project might seem appealing to you to save money, but it is never a great option. Roofing is something that needs experience and care in working on. There is no good reason why you should try to DIY a project for roofing in Orlando. In the end, you might feel as if you are saving money, but the risks involved with doing a DIY roofing project are not worth it at all.

Paying the extra money to have a professional do the work is going to save you so much in the long run. We are going to go through exactly why you should hire a professional roofing company instead of doing a DIY project yourself. Please visit us at professionalroofingorlando.com to learn even more!

Risks Associated With DIYing A Roofing Project

It’s no secret that roofing can be a complicated job and professional roofers work very hard to ensure great work (Find a job if you’re a professional roofer). You might think that DIYing a roofing project will be easy and cost effective, but we are going to go through all of the reasons why you should NOT DIY a roofing project. From safety reasons and quality work, we are going to cover it all.

Injuries: The most common risk associated with roofing DIY projects are injuries. Roofing jobs typically consist of someone being high up on top of the roof of your house. This can be a risk of falls specifically. Roofing is not flat and can be difficult to navigate with different roofing tops. If there is extensive damage to the roof then you have a risk of falling through the roof if you step on a spot that is not solid. There is also a huge risk of you falling directly off of the roof if you slip or if there is any wetness on the roof it can be hard to gain traction.

Low Quality Repairs: Low quality roof repairs are also another risk of doing a DIY roofing project. Roof repairs that are low quality have a higher chance of needing professional attention and repairs later on. They can also cause extensive damage to the roof which can cause even worse roofing problems than you began with. There could be a higher risk of needing a full roof replacement if you do DIY repairs yourself on the roof.

Safety Risks: Other safety risks are possible with DIY roofing projects. There are risks of tool mishandling and getting up and down to the roof with these tools. There is a risk of being hurt by the particular tools or using the ladder to get up and down. If you aren’t professionally trained then it is very easy to make mistakes that can lead to serious injury.

Project Delays & Problems: If you are not a professional and are trying to do a roof repair, then you may find yourself encountering many different delays or problems. This can delay the entire project which can cause many other issues. If the project is delayed then there can be more room for problems and that can arise.

Dissatisfaction With Results: Results for roofing jobs are very important for clients. If you decide to DIY the roofing job, then you may not be satisfied with the results of your job. This can cost you more money and time because you will have to do the repairs again and have a professional fix your roof.

Benefits Of Hiring A Professional Roofer

Hiring a professional roofer is the only way to get your roofing jobs done. You can visit this website to learn how professionals use their expertise to inspect the roof and work out a reliable plan according to your requirements. Fixing or replacing a roof takes a great amount of training and expertise to accomplish without problems. It also ensures that there are safety precautions set in place. Hiring a professional roofer comes with many benefits which ensure the best roofing job possible. Here are a few advantages of hiring a professional roofer to get your job done.

Experience: Hiring a professional roofer can guarantee experience. Professionals with experience can ensure a better result in the roof as well as problem solving expertise. Professional roofers go through extensive training and have many years of on the job experience. This will give you peace of mind when having a roofer work on your roof. No amount of blogs, YouTube videos or anything else will educate you enough to compare to a professional roofer’s education in their field.

Warranty & Insurance: Working with a professional roofing company will guarantee you a warranty and insurance in case anything happens on the job. If there are any injuries or anything gets broken in the project then you aren’t liable and the insurance will take care of it. This is not the case if you decide to DIYthe project. You have no protection for any injuries or damage that could be done.

Timely Service: Hiring a roofing team will benefit you in the time category as well. An amateur will take significantly longer to complete a roofing repair or replacement than a team of professional roofers will.

Quality Results: Professional roofers will ensure that you have great quality results. Nothing will be half done and everything is done with high quality materials and experienced workers. Getting good quality work done will eliminate the need for future repairs or replacements on your roof.

Hiring A Professional Roofing Company vs. DIY

Overall, there are many benefits to hiring a professional roofing company versus doing a DIY roofing project yourself. Roofing companies will provide great quality work in a timely manner. Professional roofers will provide you with professional experts to take care of your roofing needs in a timely manner with great quality work. You won’t have to stress about possible injuries, quality work or time.

Be sure to always put your trust in professional roofers to get your project done. DIYing a roofing project is never an option. To ensure there are no risks, you should always contact a roofing company to do professional work. Call a professional for roofing in Orlando to get an estimate on your roofing demands and to find out what repairs you might need.

Filed Under: DIY

How to Make Perfect Xmas Cards

September 20, 2021

C:\Users\Faizan Asim\Downloads\load-image.png

According to major card seller, Hallmark, an estimated 1.3 billion Christmas cards are sent each year. This makes Christmas the biggest card-sending holiday of all!

If you’re looking for a way to break away from the norm and do something unique this year, why not try making homemade Xmas cards?

Even if you’re not a “crafty” person, there are plenty of ways to approach making Xmas cards that anyone can tackle–and even enjoy.

Read on for some great tips and tricks for making your very own Xmas cards for the upcoming holiday season.

Use Christmas Tags and Practice Your Calligraphy

Do you have naturally pretty handwriting? Do you want to give calligraphy a try?

These DIY Xmas cards are super easy to make and require only a few affordable materials. All you’ll need are large Christmas present tags, a calligraphy pen, and some blank cards.

Glue your tags to the front panels of your cards at a quirky angle. Then, grab your calligraphy pen and get creative with seasonal greetings of your choosing. The inside is then open to share a message and add your signature.

Grab Some Cookie Cutters and Paint

Christmas cookie cutters are easy to find at craft and home goods stores around this time. Plus, a fun assortment of mini cookie cutters won’t cost much at all.

Once you have your assortment of cookie cutters, grab a few seasonal colors of acrylic paint. You can stay traditional with red and green or get creative with other wintery colors like blue and even pink.

Use a paintbrush to apply paint to the bottom edge of your cookie cutters and start stamping your shapes onto your cards. You can go minimalist with a single image per card or add a fun jumble of holiday shapes. While the paint is still wet, you can dust your cards with a bit of fine glitter or even cinnamon.

Stencil On the Xmas Fun

If you want to include gorgeous artistic images on your homemade Xmas cards but don’t have a knack for drawing, don’t worry. This Christmas tree stencil set is a perfect solution.

Stencils are very versatile which means that you can use just about any of the art supplies you already have on hand. Trace the outline of the stencil with a marker or colored pencil or use paint and fill in the entire image.

Make Rustic Cards With Fabric Cut-Outs

Do you love the nostalgic feel of rustic Christmas cards? If so, this simple Christmas card trick is perfect for you.

Grab some blank cards with a matte or soft finish. Then, use fabric scraps to cut out Christmas shapes like snowmen, trees, and stars. If freehand cutting isn’t your thing, feel free to draw your shapes on the backside of the fabric using a pen before cutting them out.

To adhere the fabric to the cards, you can use any craft glue you have on hand. Use a paintbrush or sponge brush to make sure that the glue is applied all over the backside of the fabric in a thin, even layer. Make sure the glue is dry before you put your cards in their envelopes and pop them in the mail!

(Wondering what type of fabric to use if you want to get really rustic? We recommend a classic red and white gingham!)

Make a Decorative Garland Card

Do you remember making cut-out garlands in school as a kid? Dust off those skills for this cute decorative Xmas card idea!

Grab a large piece of cardstock paper and fold it accordion-style so that you have four alternative panels. Then, draw a snowman on the outermost panel, making sure that the folded edge is not cut all the way through. Cut out your snowman and unfold your cardstock so that you have four sweet snowmen all in a row.

From here, you can decorate them so they look like traditional snowmen, drawing on details like coal buttons and a carrot nose. Alternatively, you can decorate your snowman garland with paint, glitter, or other fun art supplies for a more abstract look.

Enlist the Kiddos for Hand Trees

When you’re making homemade Christmas cards for your friends and family, enlisting your kids is a great way to spread cheer. Plus, your kids will love a reason to get crafty!

Grab some green construction paper or cardstock. Then, have your kids trace their hands and cut them out, not unlike they would when making a Thanksgiving hand turkey!

Once the green hands are cut out, you can either draw tree trunks with a brown marker or cut out tree trunks from brown paper. Glue down your trunk and then glue your green hands upside down with the trunk sticking out from the bottom to make fun Christmas trees. From there, you and the kids can decorate your trees by drawing ornaments, garlands, and stars for that final holiday touch.

Get Three-Dimensional With Glue-On Decorations

Looking for ways to bring even more life to your DIY Xmas cards? If so, it’s time to get three-dimensional by gluing on some extra decorations!

What kinds of decorations can you use? Things like ribbon and buttons are perfect and easy to attach. You can also use rhinestones, mini pompoms, and tissue paper balls to finish your cards.

Go DIY With Your Xmas Cards This Year

If you’re looking for a new way to approach Xmas cards this year, consider ditching the storebought cards and trying your hand at DIY crafting, instead! With these tips and tricks, you can make memorable cards that your recipients will love no matter how crafty you are, to begin with.

Looking for more ways to go homemade in your day-to-day life? Take a look around for guides, tips, and helpful information to make DIY projects your go-to for everything!

Filed Under: DIY

The DIY Golf Guide

August 27, 2021

The results are in: golf is becoming more popular for remote viewers to tune into. Recently, the US’s Golf Channel and NBA PGA Tour viewership ratings showed a 24% increase in viewers from 2020. Despite being considered one of the world’s slower pro sports, spectators are marking their calendars for major events like the Open and Masters tournaments.

Historically, diehard golf fans have bought tickets and lined up to view tournaments live. Not only are they surrounded by fellow golf enthusiasts, but they also get to stand close to their heroes. In some cases, they might even exchange a few words.

Another common way for fans to show their support is to wager on the outcome of a tournament. Popular oddsmakers offer golf betting odds on popular tournaments like the PGA’s Majors, as well as other competitions like the Northern Trust. Here, it’s not just about catching the action, but forecasting which pros, like Jon Rahm and Justin Thomas, will come out ahead.

But there’s one aspect of golf fandom that some struggle with: playing. With its specialized equipment (which is often pricey) and its complex technical movements, golf is a deceptively difficult sport to jump into. Casual fans often lack the resources to play themselves, but that doesn’t have to be the case.

Let’s take a quick look at how you can try out DIY golfing at home.

Equipment & At-Home Setup

The internet has made the search for affordable clubs simple. Though pros use a range of fourteen clubs for specialty shots, beginners can keep it simple with four different clubs: a driver for long shots, a putter for short shots, a wood club for long-range shots, and an iron for versatile shots.

Want to keep it super-basic? You’ll only need a putter and driver. Those with budgetary considerations can purchase used clubs online or new clubs at discount stores. New beginner sets run as low as £100.

Finding equipment is the first step. Next, beginners can set up an at-home net to start practicing their drives. Though many think that learning to golf requires membership to a driving range, all they need is a reliable net, complete golf bag accessories, and a bit of space at home.

Find suitable piping to create a frame (PVC works great). Next, construct a frame that fits your spatial needs. Those building outside can dig holes to anchor the frame, while those working on a synthetic surface can use weights. Remember, you’ll be driving balls into the net, so it will need a bit of reinforcement to stay grounded.

From there, use Nylon tie cords (or a similar product) to secure tight netting around the frame. Netting solutions are vast, though most DIY at-home guides recommend using a cheap baffle net. Those short on time can purchase a golf net directly for the web that will fit their needs. On the other hand, those who are tech-savvy can jump ahead to create a state-of-the-art, at-home golf simulation.

Learning the Ropes

With a killer setup in place and equipment ready to go, all that’s left to do is learn how to swing a club. Once again, this is a deceptively tricky skill. Luckily for newcomers, YouTube tutorials have taken the headache out of learning. Some handy videos are available today from accounts like Mark Crossfield at AskGolfGuru, the team at Buzza Golf, and Peter Finch Golf Tutorials.

The channels listed above are great for learning how to drive. Driving is a long hit, which requires the most disciplined form. Amongst pros, styles vary, so be ready to take some notes. Those struggling to learn how to drive and put their golf net to use can always search Groupon and similar sites for discount lessons at local driving ranges.

However, well-rounded golfers need to do more than drive. They also need to perform well with close quarters putting if they plan on getting the ball into the hole. For this type of practice, a golf net isn’t necessary. Tips abound on creating (and purchasing) putting sets that are great for homes of all sizes. Keep in mind that a trip to the local put-put course is also an exciting way to practice short-range shots… with a few zany obstacles thrown in.


Filed Under: DIY

DIY kitchen projects to tackle this summer

May 28, 2021

Have you spent more time in the kitchen than usual in the past year? From banana breads to elaborate date night dinners, many of us have tried to recreate the joy of our favourite cafes and restaurants while they’ve been temporarily closed.

But while your cooking skills might’ve improved, you may also have noticed a few areas and items in need of an upgrade. A recent survey found that three in five homeowners had been inspired to renovate during the pandemic.

So what projects could you take on this summer in preparation for the return of dinner parties and other social events? Get ideas for a kitchen refresh below.

Up your organisation

Is your space dominated by clutter? A messy kitchen can be frustrating at best and hazardous at worst. A survey by personal injury experts National Accident Helpline found the kitchen to be the most dangerous room in the home, so it could be time to get things in order.

Organisation doesn’t have to be boring though. Decanting everyday items such as coffee, nuts and pasta into clear containers is a great way to reduce packaging and make things easy to find. You could do the same with spices and create a pantry with clear, attractive labels.

Can you go vertical too? Open shelving and hooks will make items more accessible while displaying your decorations. Investing in modern pull-out drawers and cupboards meanwhile could make the most of dead space in corners.

Refresh or redecorate

If you’re tired of your kitchen’s appearance (or your kitchen’s appearance is tired), there are lots of effective ways to redecorate without completely starting afresh. You should consider implementing a kitchen splashback from Simply Plastics.

Repainting your kitchen cabinets is one of the most impactful. If your current colour scheme is neutral for example, could you create contrast with dark lower cupboards and lighter upper cabinets?

Or there’s your kitchen worktops. If replacing them with high-end materials like quartz or granite is a little too expensive, you could try a marble-effect wrap instead.

Repainting your custom kitchen cabinets is one of the most impactful. If your current colour scheme is neutral for example, could you create contrast with dark lower cupboards and lighter upper cabinets?

Don’t be afraid to experiment with tiling too. Your backsplash area is the most obvious area to target – but there’s no reason why you can’t introduce tiling in larger sections. Get creative with their layout or introduce eye-catching patterned designs. Check Neo Kitchen to learn more about the different innovative designs to achieve a beautiful and stylish kitchen..

Upgrade fittings and appliances

From taps to handles, you’ve got plenty of options for smaller upgrades too. You could even create your own drawer pulls to make your kitchen truly unique.

Or for a more modern take on DIY, could 2021 be the year you truly embrace technology? You could invest in multiple smart appliances and link them up to make prepping, cooking and hosting as optimised as possible!

The kitchen is the heart of the home, so it deserves your love and attention. Take on one or several of these projects and create a space to be proud of.


Filed Under: DIY

4 Tips on Home Improvement That You Should Know

May 10, 2019

It’s not uncommon for many homeowners to feel the itch to remodel or renovate their properties. After all, a house is no more than a place for human habitation until it’s been properly personalised and made into our own. But with the involving work and rising costs of materials and services that these projects often entail, it makes sense to tackle the task responsibly and use a downloadable budget template so you don’t overspend. To this end, here are a few tips on home improvement that you should know.

Choose projects that will increase the value of your home

While home renovations and remodelling projects are primarily done to improve the comfort and liveability of a home, changes made to the property can also affect its worth. As such, it makes sense to choose to prioritise projects that will increase your home’s value such as the addition of modern amenities like freestanding baths for your bathroom areas or upgrading to more energy-efficient lighting systems. In doing so, not only will you make the house much more comfortable to live in but also achieve a better return on your investment.

Know when to do-it-yourself

Even with a stock of tools and equipment, not all projects can be done on our own. And while it may seem like an additional expense, it’s good standard practice to know when to leave specific tasks to professionals. In this way, you will be mitigating costly mistakes, which should save you both time and money. More importantly, you’ll also be able to avoid safety hazards and prevent dangerous accidents from occurring.

Study and research

Whether it’s to hone your DIY skills or to find inexpensive alternatives to the materials and services that your project needs, it’s never a bad thing to study and do research. After all, the more you know, the less likely you’ll encounter problems mid-project and the better your chances of getting good deals. Best of all, there are plenty of resources online, making it relatively easy to do.

Don’t bite off more than you can chew

Home improvement projects can often require a substantial commitment of financial resources. And depending on the scale of the renovation, it’s always better to try to stick to one project at a time. Doing so will not only keep you focused on the task at hand and maintain a consistently high level of productivity, but you will also be able to avoid delays and mitigate the risks of potentially blowing the allotted budget and breaking the bank in the process too.

Despite how increasingly popular they have become in recent years; House Unleashed projects are huge undertakings that can be as time-consuming as they are costly. But by staying disciplined and tackling each project responsibly, not only will you increase your chances of making sure that they are completed promptly, but you are much more likely to get the desired results without having to spend a small fortune to do so as well.

If you want to learn more about our blog, please click here.

Filed Under: DIY

Primary Sidebar

About Us

Trish here! I’m a stay at home mom, a writer, a blogger. I love my family – three kids and a husband. We also have a cat and a dog. Our household can seem pretty busy at times, but everyone always pitches in to help out Read More…

Latest Post

  • The Top 7 Family-Friendly Destinations in America
  • Financial Incentives for Solar Panel Installation
  • The Top Reasons Why You Should Think of Decluttering Your Home Today
  • How to Combine Different Styles of Furniture for a Personalised Look
  • Savouring Home Flavours: Culinary Adventures and Kitchen Safety

Newsletter

Connect With Us

  • Facebook
  • Instagram
  • Twitter

Latest

The Top 7 Family-Friendly Destinations in America

Financial Incentives for Solar Panel Installation

Free High Angle Shot of Solar Panels Stock Photo

The Top Reasons Why You Should Think of Decluttering Your Home Today

C:\Users\User\Downloads\flea-market-1681489_1280.jpg

How to Combine Different Styles of Furniture for a Personalised Look

Savouring Home Flavours: Culinary Adventures and Kitchen Safety

white over-the-range oven

Footer

About Us

Trish here! I’m a stay at home mom, a writer, a blogger. I love my family – three kids and a husband. We also have a cat and a dog. Our household can seem pretty busy at times, but everyone always pitches in to help out Read More…

NEWSLETTER

Connect With us

  • Facebook
  • Instagram
  • Twitter

Copyright © 2023 This Home Made Life on the Brunch Pro Theme