With technological advancement and a gradual drift to dependence on electrical devices, a reliable battery backup is quickly becoming necessary. While some consider a portable power station a last resort during a power failure, several other reasons exist for using this emergency tool.
Portable power stations are an effective battery backup for most home appliances like television, fridges, laptops, ovens, microwaves, blenders, mixers, etc. As a reliable alternative power source, it keeps your home appliances running so you can have basic amenities during power outages.
In fact, with enough bells and whistles surrounding this device, it is a must-have for every household and office. Portable power stations aren’t just perfect for your home; they make life easy and happier for you. Follow through as we dive further into this device and how to have a seamless experience with one in your home.
What is Portable Power Station?
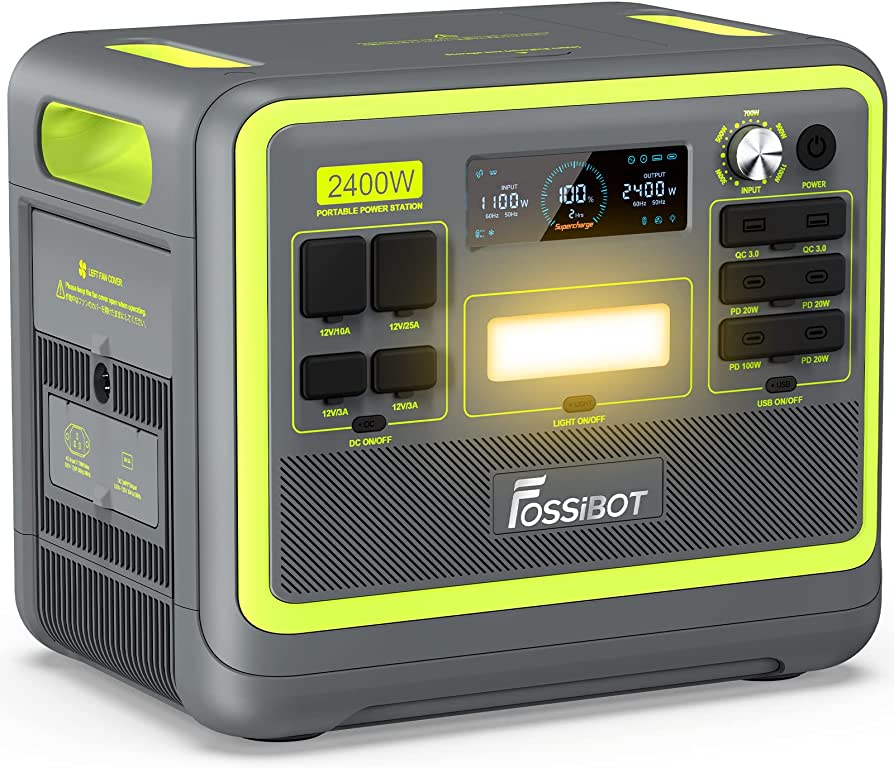
A portable power station is a large power bank with an AC output. Portable power stations combine large battery capacity to store electrical energy used to power home and office appliances during an emergency or power outage.
They are a reliable and efficient power source with varying large battery capacities to power several home appliances simultaneously. For instance, a Chinese 1000Wh power station made in Sunly can run your TV and other appliances for about 2-7 hours. In addition, portable power stations are rechargeable battery that allows you to take electricity beyond the confines of your home.
Portable Power Station Battery
Portable power stations can supply emergency power for about 10 hours, even running into days when fully charged, solely due to their battery technology. The three most frequently used battery technology in a portable power station are; lithium-ion, nickel-metal hydride, and lead acid. Each battery type has pros and cons; however, you can decide the one that best suits your need.
Interestingly, with technological advancement, LiFePO4 batteries are popular in portable power stations. This battery type is less than half the conventional lead-acid battery’s weight and greatly offers enhanced cycle life, making it ideal for storing energy for portable purposes.
How to Have a Seamless Experience with Portable Power Stations
Yes, everyone wants it easy in life. And having a portable power station to address your fears and aches regarding electricity at home is one great step to an easy and comfortable life. If you got a portable power station at home or you’re considering buying one, here are tips on how to have a seamless experience with one. These tips are an eye-opener to enjoying your device while serving you for a long time.
- Charge your power station ahead of time and keep it connected to an outlet to be fully charged.
- Ensure you place your portable power station in a safe and dry place.
- Only use essential devices and home appliances when there’s a power outage. Suppose you’re baking and using appliances such as a mixer or blender that involves several mixing processes and a sudden power outage. In that case, you need to disconnect other devices to conserve the charge on your power station.
- Unplug all home appliances and devices from their outlets and plug them into your portable power station during a power outage. Remember to plug the essential ones first, like a blender, refrigerator, medical devices, etc. Using a home integration kit, you can also integrate the power station into your home circuit.
- Once the power is restored, unplug all appliances from the portable power station and return them to their original power source. Or return your home integration kit switch to grid power.
How to Charge Your Portable Power Station at Home
In an emergency case or situation, it is crucial to have a hands-on portable power station. But how do you keep the device charged so it can serve you better? Here are a few tips for doing that;
- Standard household outlet: A standard household outlet is the most common and easiest way to charge your portable power station. Just plug the device into the outlet on the wall and charge it.
- Car charger: A car charger can also keep your portable power station charged while on the go. Just plug your device into your car’s 12V outlet and leave it to charge.
- Solar panel: If you can access sunlight, you can use a solar panel to charge your portable power station. This is a perfect outdoor alternative and away from the traditional power source.
How to Select the Right Portable Power Station for Home Appliances
A good portable power station keeps you from the dark, powers your home appliances, and helps weather the storm. But with different models in the market, how do you choose the right one for your home appliances? Let’s help you consider the right choice. Here are a few tips to note!
- Capacity: Select the portable power station that can meet your need. They come in different sizes, from small units that can charge a couple of home devices to large units that can power larger devices.
- Ports: Consider the type of port the power station has. Some have multiple USB ports, while some have DC and AC ports.
- Portability: An easy-to-carry portable power station is much better than larger and heavier ones. Consider this factor if you plan to use it for outdoor activities.
- Run time: Portable power stations have different runtimes. Some can go for hours, while others can last a few days. Depending on your need at home, choose the one that best suits you.
Takeaway
It is important to stay prepared if you live in areas prone to a natural disasters. And portable power stations are a great deal in your emergency prep; their benefits are enormous. Do thorough research to make an informed decision for your household appliances.