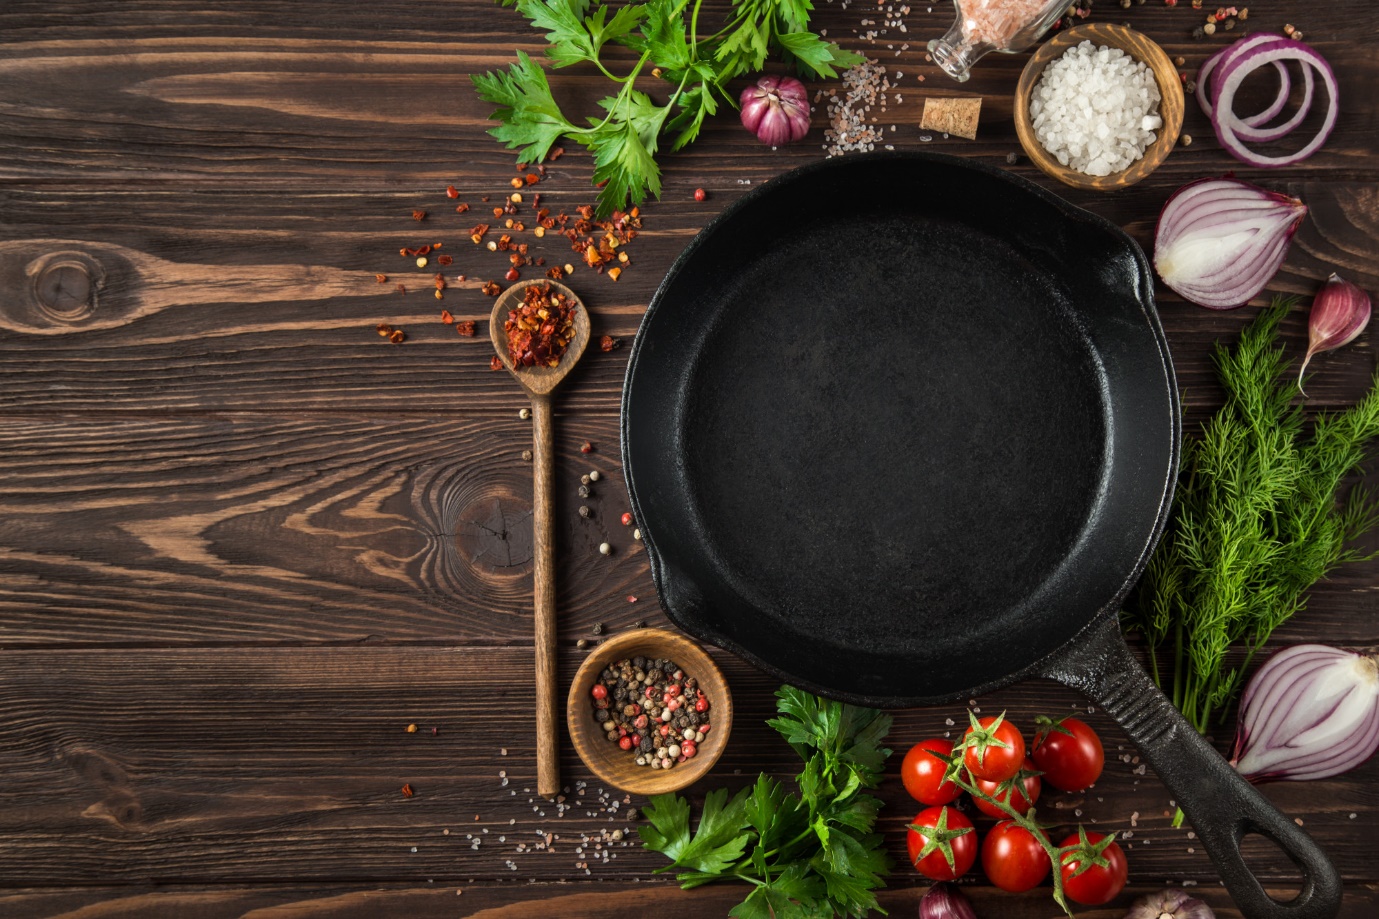
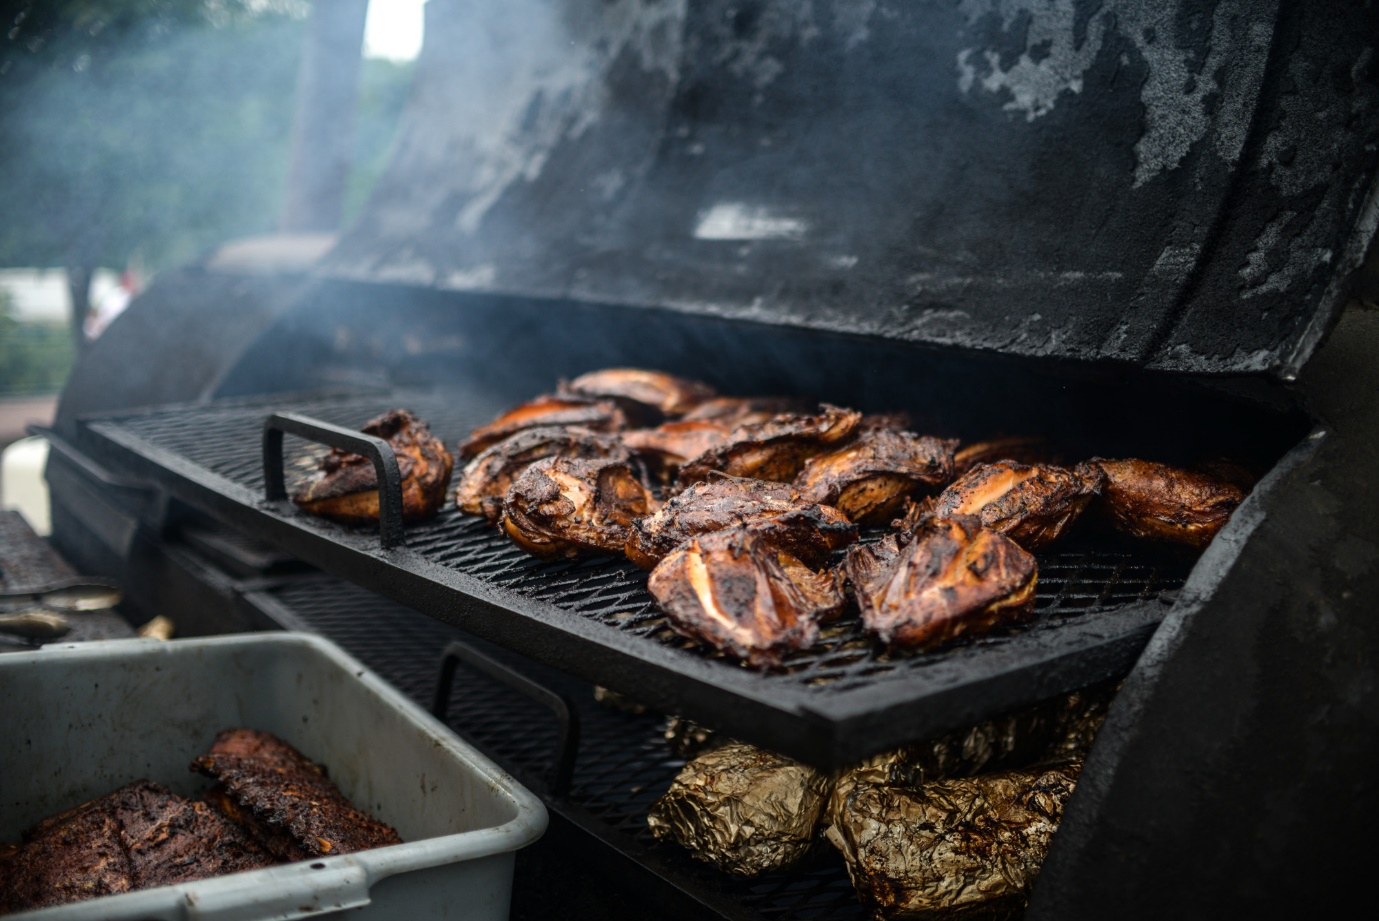
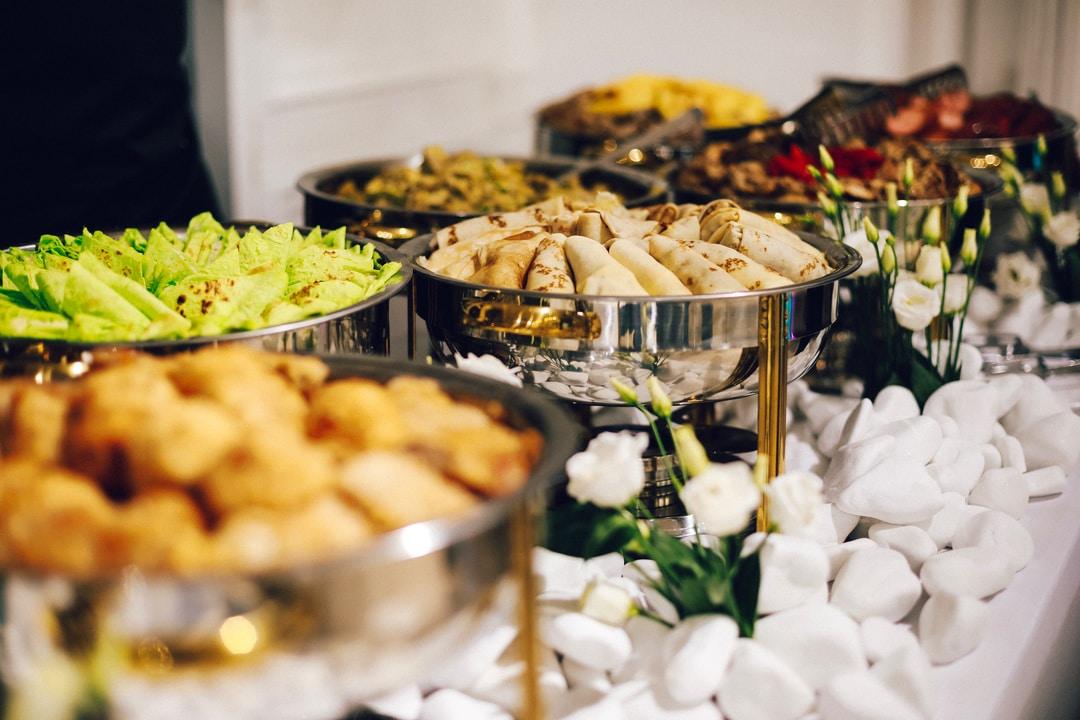
• Skip to main content
  • Skip to primary sidebar
  • Skip to footer

This Home Made Life logo

  • Home
  • About
  • Blog
  • Business
  • Cooking
  • DIY
  • Family
  • Home & Garden
  • Money
  • Travel
  • Contact

Cooking

The Growing Popularity of Veganism

October 13, 2019

In the past few years veganism has enjoyed a surge in popularity. There are various factors which have led countless individuals to give up meat and animal products for good. To discover some of the key factors which have directly influenced the growing popularity of veganism, simply continue reading to understand why veganism is a result of societal changes.

Below details the rise and fall of veganism in each state. This informative image has been brought to you by OWYN. If you want to discuss this topic, use #VeggieVsVegan when sharing on social media!

The Growing Popularity of Veganism: Why More Individuals Are Choosing to Follow a Vegan Diet

More individuals are becoming health conscious:

Many individuals choose to become vegans as they want to lead a healthy lifestyle and to consume a balanced, nutritious diet which is jam packed full of vitamins and nutrients. If you start following a vegan diet within a couple of weeks you should start to notice that you have more energy to get through each day and that it’s easier to maintain a healthy weight. You may even discover that your hair, skin and nails will become healthier as a result of following a vegan diet.

You can decrease your chances of developing cardiovascular dieases:

By following a vegan diet you can significantly decrease your chances of developing a serious cardiovascular disease such as heart disease. If you’d love to enjoy a long, healthy life and to be around to witness all of your kids milestones, it’s a great idea to consider following a nutritious vegan diet.

Individuals who follow a vegan diet typically consume more fresh food than meat eaters:

You shouldn’t be surprised to find out that the average vegan consumes a lot more fresh organic food such as legumes, fruits and vegetables than the average meat eater. So if you’d like to clean up your diet, you may find it worthwhile following a vegan diet. As you may be inspired to start growing your own fruits and vegetables or to visit your local farmers market on a weekly basis, in order to pick up locally grown, organic produce.

Becoming vegan is a eco-friendly choice:

As livestock such as cows are responsible for much of the world’s methane which contributes to the world’s carbon emissions, if you choose to become a vegetarian, you’ll also be making an eco-friendly choice.

Becoming a vegan is a great choice if you’re an animal lover:

If you’re a self confessed animal lover you may find becoming a vegan fits in with your individual morals and ethics.

Is there a viable option if the transition to becoming a vegan is too difficult?

Yes, if you’ve been an avid meat eater for the majority of your life, you may find it difficult to transition over night from being a meat eater to being a vegan. As vegans do not consume animal by products such as milk, cheese, yoghurt or eggs. However, more and more vegan companies are beginning to offer vegan friendly substitutes than taste similar to the real thing. Alternatively, you may want to test out becoming a vegetarian, for a month or two, before making the decision to fully commit to becoming a fully fledged vegan.

So if you’re curious about following a vegan lifestyle, it’s well worth looking up scrumptious vegan recipes and testing out becoming a vegan for a week or two. As you should find that you’ll start to lead a healthier lifestyle than when you were a meat eater.


Filed Under: Cooking

How To Host The Perfect Dinner Party

March 4, 2019

If it’s been a while since you’ve hosted a cozy dinner party, it’s well worth continuing reading in order to discover a few tips which will help you host the perfect dinner party. As an example, you’ll learn how to impress your guests by serving tasty appetizing dishes.

How to host the perfect dinner party:

1. Find a quick recipe for a make ahead apple crisp

If you’re looking for a tasty treat to serve your guests for dessert, you can’t go wrong choosing to prepare a crunchy yet sweet apple crisp. What exactly is an apple crisp? An apple crisp contains an apple strudel crust, freshly chopped apples, brown sugar and a mixture of oats.

If the vast majority of your dinner guests have sweet tooths, you may want to surprise your dinner guests by placing a scoop of vanilla ice cream on each apple crisp and drizzling high-quality caramel sauce over each serving of apple crisp.

2. When it comes to selecting mains for your dinner party, make sure to offer 2-3 different options

While your parents and parents generation may have served all of their guests the same exact dish, in today’s day and age it’s a far wiser idea to offer 2-3 different options. As not all of your guests may enjoy the same dishes and some of your guests may have special dietary requirements.

As examples, some of your guests may not eat meat, while some of your guests may have an intolerance to nuts, gluten or dairy products.

If you’re unsure of what types of mains you should offer, you may want to offer one white meat option such as grilled chicken or salmon, as well as a red meat option such as steak and a vegetarian option such as a mushroom risotto.

3. Prepare your guests favorite meals as a surprise

If you know the guests who you plan to invite to your dinner party well, you can’t go wrong making the effort to prepare some of your guests’ favorite meals as a surprise. As your guests will be impressed that at your thoughtfulness and your ability to remember some of their personal preferences.

4. Make sure to select your guests carefully

Think carefully about which of your friends and family members are likely to get on well before you start finalizing a guest list for your dinner party.

5. Make sure to introduce each of your guests to one another

Part of the art of being a great host is to be able to make all of your friends feel comfortable. So it’s well worth introducing your friends to one another and encouraging friends who have similar interests to talk to each other. As an example, if you are aware that two of your guests love to travel, it’s well worth starting a conversation with both friends about travel.

So if it’s been a while since you’ve invited a few friends around for a cozy dinner party, it’s a great idea to use the tips listed above to throw a successful dinner party.

Filed Under: Blog, Cooking, Family

How To Refrigerate Pickles Using Pickling Spice

March 4, 2019

Can you pickle Armenian cucumbers? If you’re curious as to whether you can pickle Armenian cucumbers, the answer is yes. In order to pickle your Armenian cucumbers, simply use a homemade pickling spice in order to preserve your Armenian pickles.

If you’re interested, simply continue reading, to discover a simple easy to follow pickling spice recipe. Better yet, this particular recipe will only take you 10 minutes to complete from start to finish!

Refrigerator pickles using pickling spice recipe:

– 2 tablespoons of mustard seed
– 1 teaspoon of ground ginger
– 1 tablespoon of allspice
– 2 teaspoons of coriander seeds
– 2 cloves
– 1 teaspoon of ground ginger
– 1 teaspoon of crushed red pepper flakes
– 1 crumbled bay leaf
– 2 inches of a cinnamon stick

How to create your pickling spice:

Simply place all of the ingredients listed above in medium sized mixing bowl and stir all of your ingredients until they are thoroughly mixed together. Once you’ve mixed all of your ingredients together, spoon your ready-made pickling spice into an airtight container and there you have it, your very own homemade pickling spice!

How to use your pickling spice to preserve pickles such as Armenian pickles:

If you’re unsure of how to use your pickling spice when it comes time to pickle your cucumbers and your place your cucumbers in a jar of vinegar, make sure to sprinkle a generous amount of your homemade pickling spice into each jar. As your pickling spice will contain natural preservatives, that will ensure that your pickles will stay fresh for several months.

So if you’re looking to pickle pickles, onions, jalapenos, beetroot or cauliflower, it’s well worth trying out the pickling spice recipe listed out above.

How to use your pickles:

1. Use your pickles in homemade burgers and hotdogs

If you often invite friends over to your home for barbecues, especially in the warm summer months, it’s a great idea to use pickles in homemade burgers and hotdogs.

2. To add a bit of flavor to your favorite salads

If you enjoy eating salad and are looking for a new way to add a bit of flavor to your everyday salads, it’s a great idea to place cut a few thin slices of your pickles in your salads. As an example, you may want to place your pickles in a salad with olives, feta cheese, beetroot, tomato, and egg.

3. In healthy wraps

If you’re looking to experiment with a new work-friendly lunch idea, you may want to have a go at using pickles in healthy wraps. As an example, you may want to use pickles in a delicious homemade wrap with a bit of shredded chicken, some spinach, some carrots and a bit of tomato.

4. On a pizza

While you may never have considered placing pickles on a pizza, if you’re looking to get creative with your pizza making, you may want to try adding pickles to your pizza toppings.

So if you are interested in adding pickles to your everyday meals, it’s well worth trying out the pickling spice recipe listed above.

Filed Under: Blog, Cooking, Home & Garden

How To Make Iced Tea Concentrate and Tazo Zen Iced Tea

March 4, 2019

If you’re interested in learning how to make your own home-made iced tea concentrate or are looking to find a Tazo Zen iced tea recipe, simply continue reading to discover a simple iced tea concentrate recipe and an easy to follow Tazo Zen iced tea recipe.

How to make iced tea concentrate:

If you drink iced tea on a regular basis and would appreciate being able to make iced tea at your home, on a frequent basis without having to complete a lot of prep work, it’s well worth learning how to make iced tea concentrate in advance.

Ingredients:

– 15 tea bags
– 8 cups of boiled water
– ice
– a large pitcher

Step by step instructions:

1. Take your 8 cups of boiled water and gently pour all 8 cups of your boiled water into a large pitcher.
2. Select 15 tea bags from your favorite brand and place them into your pitcher.
3. Let your 15 tea bags steep in your pitcher for around 5 minutes. To ensure that the flavor from your chosen tea bags infuses the water in your pitcher.
4. Remove your 15 tea bags and throw them away.
5. Let your pitcher of tea cool down.
6. Pour your pitcher of tea into refrigerator safe, resealable containers, which you’ll be able to use to store your iced tea in your fridge until you need it to create fresh iced tea. Which you’ll be able to dilute from your strong iced tea concentrate.

How to make Tazo Zen iced tea:

Ingredients:

– 2 quarts of water
– 7 Tazo Zen tea bags
– your choice of sweetener as an example once cup of sugar dissolved in one cup of cold water

Step by step instructions:

1. Heat your 2 quarts of water in a saucepan on a medium heat. Bring your saucepan to a simmer.
2. Turn off your element and add your 7 tea bags to your water.
3. Cover your saucepan with a lid and let your tea bags infuse your water for 15 minutes.
4. Place your concentrate in a pitcher and place it in your fridge whilst you prepare your Tazo Zen iced tea’s syrup.
5. In a second saucepan mix once up of plain water with a cup of sugar or honey. Boil the contents of your pot until your sugar of honey has dissolved completely. Pour your mixture into a plastic squeezable ketchup bottle and place it in your fridge.
6. Fill a tall glass halfway up with your iced tea pitcher and add a bit of your syrup which you prepared into your glass. If you’re looking for a bigger drink simply fill 2/3 of your glass with your Tazo Zen iced tea.

After taking a sip of your Tao Zen iced tea you may be surprised at just how close your homemade iced tea tastes to Starbuck’s iced tea as Starbuck’s features Tazo Zen branded iced tea.

So if you love nothing more than quenching your thirst on a hot day with a tall glass of ice tea, you simply can’t go wrong trying out the two recipes listed above!

Filed Under: Blog, Cooking

Ice Cream Sundae Ideas: How To Make Homemade Magic Shell

March 4, 2019

If you love eating ice cream sundaes on sunny, warm days, simply continue reading to discover a few creative tips for how to create scrumptious homemade ice cream sundaes. As an example, if you continue reading you’ll discover how to make your very own homemade magic shell, which will harden on top of your ice cream. Just like the magic shell syrup, which you can request at a proper ice cream store.

Creative ice cream sundae ideas:

– Use your own homemade magic shell syrup in order to create a hard chocolate shell over your ice cream sundae

Magic shell recipe coconut oil:

1. 1 cup of chocolate chips
2. 3 teaspoons of solid coconut oil

Directions:

1. Pour 1 cup of chocolate chips and 3 tablespoons of solid coconut oil into a small bowl.

2. Microwave your bowl and its contents for 20 seconds. After which you should stop your microwave and stir the contents of your bowl. Once you’ve stirred the contents of your bowl, microwave your small bowl for an extra 20 seconds, before stopping your microwave to stir the ingredients of your small bowl again. Continue this process until your coconut oil and chocolate chips have melted completely.

3. Once your homemade magic shell syrup has cooled down place it on top of your ice cream so that it will set hard.

– Create a traditional banana split

Banana split ingredients:

– 1 medium-sized, ripe banana
– 2 tablespoons of fresh or canned pineapple
– 2 tablespoons of sliced strawberries
– 2 tablespoons of whipped cream
– 1 tablespoon of chopped peanuts
– 1 tablespoon of chocolate syrup
– 2 cherries

Instructions:

1. Place your ripe banana in an oval dessert dish and place your two scoops of ice cream inside your banana. To do this you may need to cut a straight line through your banana.

2. Top off your banana and ice cream with all of the ingredients listed above such as your pineapple, strawberries, whipped cream, chopped peanuts, and chopped peanuts. Make sure to place your two decorative strawberries on the very top of your banana sundae, on top of your whipped cream. To ensure that your banana split sundae is decorative as well as delicious.

If you’re unsure of what flavor ice cream goes well with a traditional banana split sundae, you can’t go wrong opting for either vanilla ice cream or chocolate ice cream. Both of which compliment a banana sundae.

Create a Neopolitan ice cream sundae:

If you’re the type of individual who can never make up their mind, when it comes time to choose an ice cream flavor, you can go wrong choosing to make a fun Neopolitan ice cream.

Simply scoop a scoop of strawberry ice cream, a scoop of vanilla ice cream and a scoop of chocolate ice cream into a dessert bowl and place a wafer on top of one of your ice cream scoops. Before drizzling a bit of chocolate sauce onto your Neopolitan ice cream sundae.

So if you love devouring ice cream and like the idea of making your own homemade sundaes, it’s well worth testing out all 3 homemade ice cream sundae ideas!

Filed Under: Blog, Cooking

Fuss-Free Vanilla Rooibos Tea Latte

March 4, 2019

If you’re interested in creating a Starbuck’s inspired vanilla rooibos tea latte, you’ve come to the right place. Simply continue reading to discover a simple, easy to follow, vanilla rooibos tea latte recipe to try out. Better yet, this particular recipe will only take you around four minutes to prepare.

Fuss-free vanilla rooibos tea latte recipe:

Ingredients list:

– 1 and 1/2 cups of skim milk or dairy-free milk
– 3/4 cup of water
– 2 rooibos tea bags
– 2 teaspoons of vanilla syrup
– 1/2 a teaspoon of sugar, honey or artificial sweetener
– 1 dash of cinnamon

Instructions:

1. Pour half of your milk into your first mug and the rest of your milk into a second mug. Then place one rooibos tea bag in each of your mugs.

2. Place each of your mugs in your microwave for 1 minute. Making sure to place one mug in your microwave at a time.

3. Next, add half of your water to each of your mugs

4. Microwave each of your mugs for a further minute. Remember to place one mug in your microwave at a time.

5. Add your cinnamon, sugar or artificial sweetener and vanilla syrup, to each of your mugs.

6. Use a spoon to stir the ingredients of both of your mugs.

Alternative vanilla rooibos tea latte recipe:

If you’d like to try a stronger, spicier rooibos tea latte, you may be interested in following the recipe below.

Ingredients:

– 2 vanilla rooibos tea bag
– 6 oz of boiling hot water
– 6 oz of plant-based milk
– 1 pitted date
– 1 teaspoon of ground cinnamon
– 1/4 teaspoon of vanilla extract
– freshly ground nutmeg

Instructions:

1. Place a small or medium-sized saucepan on one of your elements and turn your element on to a medium setting.

2. Add your plant milk, your date, your coconut butter, your cinnamon and your vanilla extract to your saucepan.

3. Boil water and fill two mugs with water. Place a vanilla rooibos tea bag into each of your mugs. Leave your tea bags in your mugs to seep for 3 minutes. After which, you can remove your tea bags from your mugs.

4. Next carefully pour the contents of your saucepan into a standard blender.

5. Turn your blender on to a medium setting for 20 seconds. So that your ingredients

6. Now pour some of your blended plant milk into each of your mugs. So that your plant milk mixes with your rooibos tea.

So if you have a craving for vanilla rooibos tea latte, it’s well worth trying out one or both of the fuss-free recipes listed above. As both recipes can be created in just a few minutes and are a lot cheaper to make than if you were to purchase a vanilla rooibos tea latte from an expensive coffee store like Starbucks!

If you’re a huge fan of vanilla rooibos tea lattes, it may be worth trying out both recipes, to see whether you prefer the first recipe which is more a traditional vanilla rooibos tea latte recipes or a more modern, plant milk based vanilla rooibos tea latte.

Filed Under: Blog, Cooking

How To Make Vegan Pancake Mix and Peanut Butter Pancakes From Scratch

March 4, 2019

If you enjoy making yourself or your loved one’s pancakes on a lazy Saturday or Sunday morning, continue reading to discover how to make peanut butter pancakes as well as how to make vegan pancakes.

How to make peanut butter pancakes:

Whether you follow a vegan diet or you’re interested in treating your vegan friends to some scrumptious vegan pancakes, simply continue reading to discover how to make vegan pancakes, from scratch, without using eggs or milk.

How to make vegan pancake mix from scratch without eggs:

Ingredients:

– 1 and 1/4 cups of all purpose flour
– 1 tablespoon of baking powder
– 1 tablespoon of sugar
– 1/4 teaspoon of salt
– 1 cup of soy milk or almond milk
– 2 tablespoons of vegetable oil
– 2 tablespoons of water

Directions:

1. In a medium sized bowl mix 1 and 1/4 cup of all-purpose flour, 1 tablespoon of baking powder, 1 tablespoon of sugar and 1/4 teaspoon of salt in a medium-sized bowl.

2. Pour your cup of dairy-free soy milk or almond milk, 2 tablespoons of vegetable oil and 2 tablespoons of water into your dry ingredients.

3. Stir your dry ingredients into your wet ingredients thoroughly.

4. Use butter or oil to grease a medium sized fry pan.

5. Fry each pancake as you normally would.

How to make peanut butter pancakes:

If you’ve never tasted homemade peanut butter pancakes, you don’t know what you’re missing. Simply continue reading to discover how to make your very own peanut butter pancakes.

Ingredients:

– Pancake mix
– 2 tablespoons of sugar
– 1 medium-sized egg
– 1/3 of a cup of your favorite peanut butter
– 5 ounces of milk or dairy-free soy milk or almond milk
– 1/3 of a cup of water
– 1/4 cup of softened butter
– 2 tablespoons of butter

Directions:

1. Place your pancake mix into a medium sized bowl and mix 2 tablespoons of sugar into your pancake mix.

2. In a smaller bowl beat together your 1/3 of a cup of peanut butter, 5 ounces of milk or dairy-free milk and 1/3 of a cup of water.

3. Next mix the contents of your small bowl, into the contents of your large bowl.

4. Finally, fry your pancakes in a frypan which has been greased with a bit of butter or oil.

How to serve your pancakes:

1. Consider purchasing chocolate sauce to cover your pancakes with

While you may enjoy covering your pancakes in maple syrup, if you’re a bit of a chocoholic, you may be interested in purchasing a decadent chocolate sauce in order to coat your peanut butter pancakes or your vegan pancakes in a delicious sauce.

2. Cover your chosen pancakes with a pile of blueberries

If you’re looking for a healthy topping for your pancakes, you can’t go wrong piling blueberries onto your peanut butter pancakes or your vegan pancakes.

3. Place sliced bananas onto your pancakes

If you plan on frying peanut butter pancakes, it’s also a creative idea to place sliced bananas onto your pancakes.

So if you’re in the mood to fry up pancakes, it’s well worth trying out of one of two simply fuss-free pancake recipes listed above.

Filed Under: Blog, Cooking

How To Make Starbucks’ Iced Green Tea

March 4, 2019

If you’ve grown fond of Starbucks’ iced green tea and are looking to save yourself some money by cutting down on your Starbucks visit, continue reading to find out how to make your own inexpensive iced green tea.

Instructions: How to make Starbucks iced green tea

Ingredients:

– A 1-gallon pitcher
– 8 Tazo green tea bags
– 14 cups of water
-1 cup of sugar or 1 cup or 1 cup of organic honey

1. Boil 8 Tazo green tea bags in water, in a large saucepan

Boil 4 cups of water in a large saucepan with your 8 Tazo green tea bags for two minutes. As Starbuck uses Tazo branded green tea, to create their iced green tea. So if you want your homemade iced green tea to taste just like Starbucks’ iced green tea it’s well worth trying to get your hands on some Tazo branded green tea bags.

However, if you are unable to find Tazo green tea bags, you can still create a refreshing, mouth-watering iced green tea, using any brand of green tea that you can find at your local grocery store.

2. Remove your saucepan from its element

Turn your element off and remove your saucepan from its element and place it on a cold element. Let your tea bags seep into your water for 15 minutes.

3. Place your cup of sugar or organic honey into your pitcher

Next up, place your cup of sugar or a cup of organic honey into your 1-gallon pitcher. While your tea bags continue to seep into the water in your saucepan.

4. Remove your tea bags from your water

Remove your tea bags from your water using a pair of tongs or a spoon and throw your used tea bags away.

5. Pour your tea infused water into your pitcher

Now pour your tea infused water into your pitcher, which already contains your sugar or honey. In order to mix your ingredients use a wooden or plastic spoon with a long handle in order to stir around the ingredients of your kitchen. As ideally, you’ll want your sugar or honey to completely dissolve into your liquid.

6. Refrigerate your green tea for several hours

It’s also well worth letting your green tea sit in your fridge for a couple of hours so that your green tea will turn into iced green tea.

7. Serve your iced green tea with ice

When it comes time to serve your iced green tea, pour your iced green tea on top of crushed ice or ice cubes, in order to ensure that your iced green tea is suitably chilled. If you want to add a bit of extra flavor to your iced green tea, simply place a slice of lemon in your Starbuck’s inspired iced green tea. As lemon compliments the flavor of green tea.

Alternative instructions:

Alternatively, if you don’t want to use teabags in order to create your own homemade iced green tea, you may want to learn how to make tea concentrate. As you can also use iced green tea concentrate in order to create delicious homemade iced green tea.

Filed Under: Blog, Cooking

How To Make Chocolate Whipped Cream Frosting

March 4, 2019

If you’ve been searching for the perfect chocolate whipped cream frosting recipe, your search is over. Simply continue reading to discover how to make a sweet, chocolate whipped cream frosting.

How to make chocolate whipped cream frosting:

Ingredients:

– 1 and a half cups of whipping cream
– 1 and quarter cups of powdered sugar
– a third of a cup of baking cocoa
– 1/2 a teaspoon of vanilla

Instructions:

1. Place all of your ingredients in your mixer

Place all of your ingredients in your mixer and place your mixer on a high-speed setting until all of your ingredients have been mixed thoroughly and your chocolate whipped cream frosting looks thick and spreadable. As you don’t want your chocolate whipped cream frosting to run down the side of your cake. So it’s important that your chocolate whipped cream has a thick, solid consistency

2. Spread your chocolate whipped cream all over your cupcakes, cake pops or cake

Once you’ve successfully created your yummy chocolate whipped cream frosting, use a silicone frosting tool or a knife to carefully spread your chocolate whipped cream all over your chosen dessert. Making sure to spread your whipped cream frosting as evenly as possible.

3. Consider decorating your chocolate whipped cream frosting with a few extra toppings

As sprinkles, chocolate flakes, nuts, candy, and marshmallow will quickly stick to your whipped cream, if you’re looking to decorate your cupcakes, cakes or cake pops, it’s a great idea to sprinkle a few extra toppings onto your chocolate whipped cream frosting.

As an example, if you’re considering baking a chocolate cake for a special occasion, you may want to try decorating your whipped cream frosting with rainbow colored sprinkles. Especially if you plan on surprising a child with a bright and colorful, chocolate birthday cake.

Alternatively, if you’re looking to bake a rich chocolate cake for an adult friend or family member, you may want to experiment with carefully placing a few berries on your chocolate whipped cream frosting. As an example, you may want to decorate your chocolate cake with strawberries, raspberries, and raspberries.

Desserts which you can frost with chocolate whipped cream frosting:

While you may use whipped chocolate cream frosting in order to decorate your chocolate cakes and sponge cakes, you can also use chocolate whipped cream frosting to decorate a wide variety of desserts.

As an example, chocolate whipped cream frosting pairs well with chocolate brownies. As chocolate whipped cream frosting adds a bit of softness to the hard texture of a chocolate brownie.

If you bake cookies such as chocolate chip cookies on a regular basis, you may also want to try frosting your next batch of cookies with chocolate whipped cream frosting.

Alternatively, if you enjoy baking cheesecake, you may also be interested in decorating a chocolate cheesecake which boasts chocolate whipped cream frosting.

Lastly, if you enjoy baking cupcakes, it’s well worth using your brand new chocolate whipped cream frosting recipe, to decorate your next batch of cupcakes with.

So if you have a bit of a sweet tooth and love chocolate, it’s well worth testing out the chocolate whipped cream frosting recipe listed above. As you’ll be sure to be impressed with its texture and taste.

Filed Under: Blog, Cooking

How To Freeze Basil Pesto

March 4, 2019

Can I freeze pesto sauce? Yes, you can freeze pesto sauce. So if you’re thinking of making a bulk batch of pesto sauce, continue reading to discover how to create color me vegan’s tasty frozen basil pesto sauce.

How do you freeze basil pesto? A step by step guide to preparing and freezing basil pesto:

Ingredients:

– Fresh basil
– Olive oil
– Black pepper
– Salt
– Garlic
– Parmesan cheese
– Pine nuts

Instructions:

1. Place your garlic into a blender

First, place all of your peeled garlic cloves into your blender or food processor. Blend your garlic cloves into your garlic cloves have been blended thoroughly.

2. Add your basil leaves to your blender

Add your basil leaves to the blended garlic into your food processor and blend your garlic and basil leaves together.

3. Add the rest of your ingredients to your blender

Next, add your pine nuts, your salt and pepper, and your parmesan cheese to your blender. Before blending all of your ingredients together using your blender’s pulse function.

4. Start to add olive oil to your blender

Slowly start to pour small amounts of high-quality olive oil into your blender, in order to ensure that your ingredients blend together nicely and that your basil pesto has a smooth consistency.

5. Grab a silicone ice tray or container in order to safely freeze your freshly made pesto sauce

Next, grab a silicone ice cube tray and start to pour your basil pesto sauce into your ice cube tray. Before placing your silicone ice tray in your freezer to set. Alternatively, you can also purchase silicone freezable bags, which you’ll easily be able to pour your basil pesto into!

Once stored in your freezer your basil pesto should be edible for several months. In comparison, if you were to place your basil pesto in an airtight container in your fridge, your basil pesto would only be safe to consume for a week. So it’s well worth going to a bit of extra effort to freeze your basil pesto.

How to use your basil pesto once it’s been frozen:

If you’re curious about how to thaw out your pesto sauce when you’re ready to use it, simply leave your basil pesto out overnight to thaw, ensuring to cover the top of your basil pesto with a lid, to ensure that nothing gets into your basil pesto sauce.

If you’re not going to use your thawed out basil pesto first thing in the morning, simply place your thawed out basil pesto sauce in your fridge. So that you’ll be able to use your basil pesto to prepare your lunch or dinner.

Creative ways to use your basil pesto sauce:

1. On top of a pasta dish

If you create a mouthwatering pasta dish such as lasagne or ravioli, simply place a few teaspoons of basil pesto sauce on top of your pasta.

2. Sandwiches

Basil pesto sauce works well in sandwiches, rolls, and bagels.

So if you love consuming basil pesto and were curious about how to freeze basil pesto sauce, it’s well worth trying out the instructions outlined above!

Filed Under: Blog, Cooking

  • « Go to Previous Page
  • Go to page 1
  • Go to page 2
  • Go to page 3
  • Go to Next Page »

Primary Sidebar

About Us

Trish here! I’m a stay at home mom, a writer, a blogger. I love my family – three kids and a husband. We also have a cat and a dog. Our household can seem pretty busy at times, but everyone always pitches in to help out Read More…

Latest Post

  • Five Things To Look For When Hiring A Painting Contractor
  • How to Choose the Best Wheelbarrow for Your Gardening?
  • Easy Griddle Beef Tacos
  • Resistance Band Exercise to Help Build Stronger Shoulders
  • What Makes a Clothing Boutique Different From a Clothing Store?

Newsletter

Connect With Us

  • Facebook
  • Google+
  • Instagram
  • Twitter

Latest

Five Things To Look For When Hiring A Painting Contractor

How to Choose the Best Wheelbarrow for Your Gardening?

Easy Griddle Beef Tacos

Resistance Band Exercise to Help Build Stronger Shoulders

What Makes a Clothing Boutique Different From a Clothing Store?

Footer

About Us

Trish here! I’m a stay at home mom, a writer, a blogger. I love my family – three kids and a husband. We also have a cat and a dog. Our household can seem pretty busy at times, but everyone always pitches in to help out Read More…

NEWSLETTER

Connect With us

  • Facebook
  • Google+
  • Instagram
  • Twitter

Copyright © 2021 This Home Made Life on the Brunch Pro Theme